Premium USA-Made Research Compounds
Browse lab-tested peptides, research liquids, capsules and more.
Research Use Only (RUO): All compounds and protocols described are for laboratory research purposes only. This content is intended for trained researchers and is not medical advice.
How to Reconstitute Research Peptides: The Complete 2026 Laboratory Guide
In the dynamic field of biochemical research, the integrity and efficacy of experimental compounds are paramount. Research peptides, synthesized with meticulous precision, are typically supplied in a lyophilized, or freeze-dried, state to ensure maximum stability and shelf life. However, before these powerful molecules can be utilized in various in vitro or animal model studies, they must undergo a critical transformation: reconstitution. This process, while seemingly straightforward, demands a rigorous understanding of solvent properties, peptide chemistry, and aseptic technique to preserve the peptide’s structural integrity and biological activity.
This comprehensive laboratory guide from Loti Labs is designed to equip researchers with the knowledge and protocols necessary to reconstitute research peptides with confidence and precision. Adhering to these guidelines will help ensure the consistency and reliability of your experimental outcomes, safeguarding the valuable resources invested in your research. From selecting the appropriate solvent to mastering advanced reconstitution techniques, this guide provides a definitive roadmap for handling these sensitive compounds.
Looking for Premium Research Compounds?
Disclaimer: All compounds referenced in this guide are for in vitro and animal model research purposes only. Not for human consumption.
What Is Peptide Reconstitution?
Peptide reconstitution refers to the process of adding a suitable solvent to a lyophilized (freeze-dried) peptide powder to return it to a liquid solution. This transformation is essential because peptides, in their solid, lyophilized form, are not readily usable for most experimental applications, which typically require them to be in solution for accurate dosing and administration.
Lyophilization, also known as freeze-drying, is a dehydration process used to preserve a wide range of perishable materials, including pharmaceuticals, biological samples, and in this case, research peptides. The process involves freezing the substance and then reducing the surrounding pressure to allow the frozen water in the material to sublimate directly from the solid phase to the gas phase. This gentle drying method removes water without subjecting the peptide to high temperatures, which could otherwise degrade its delicate structure. The result is a highly porous, solid cake or powder that is significantly more stable than its liquid counterpart.
The primary reason research peptides are supplied in a lyophilized form is for enhanced stability and extended shelf life. In solution, peptides are susceptible to various degradation pathways, including hydrolysis (breakdown by water), oxidation, and proteolytic cleavage by enzymes. The absence of water in the lyophilized state drastically slows down these degradation processes, allowing peptides to be stored for extended periods, often for years, without significant loss of purity or potency. This stability is crucial for ensuring that researchers receive high-quality, intact peptides for their studies, regardless of shipping times or storage durations prior to use. Loti Labs, recognizing the critical importance of product integrity, ships all its research peptides in this stable, lyophilized format.
Note on lyophilized cake size: A common point of confusion for researchers is that the visual size of the lyophilized cake inside the vial does not correlate to the milligram weight of the peptide. A 5mg vial and a 10mg vial may appear to contain identical amounts of powder due to the highly porous, airy structure of the freeze-dried cake. Always rely on the labeled weight and COA, not visual estimation, for concentration calculations.
Furthermore, lyophilized peptides are lighter and less prone to damage during transport compared to liquid formulations, reducing shipping costs and minimizing the risk of breakage or contamination. By understanding the principles behind lyophilization and reconstitution, researchers can effectively bridge the gap between receiving a stable peptide preparation and preparing it for their specific experimental needs, ensuring the highest quality and reliability in their scientific endeavors.
Disclaimer: All compounds referenced in this guide are for in vitro and animal model research purposes only. Not for human consumption.
Selecting the Correct Solvent for Your Research Peptide
The selection of the appropriate solvent is arguably the most critical step in the peptide reconstitution process. An incorrect solvent can lead to poor solubility, peptide degradation, aggregation, or even complete loss of biological activity. The choice of solvent depends primarily on the peptide’s physiochemical properties, including its amino acid sequence, charge, hydrophobicity, and isoelectric point (pI). Below is a classification table for common research peptides and their recommended solvents, followed by detailed explanations of each solvent type.
| Peptide | Recommended Solvent | Reason/Notes |
|---|---|---|
| BPC-157 | Bacteriostatic Water (BAC Water) | Generally water-soluble. BAC water provides sterility and extends shelf life. |
| TB-500 | Bacteriostatic Water (BAC Water) | Highly water-soluble. BAC water is ideal for maintaining sterility and stability. |
| Ipamorelin | Bacteriostatic Water (BAC Water) | Good solubility in water. BAC water ensures prolonged sterility for storage. |
| CJC-1295 with DAC | Bacteriostatic Water (BAC Water) | DAC (Drug Affinity Complex) enhances stability. Soluble in BAC water. |
| CJC-1295 no DAC | 0.6% Acetic Acid then dilute with BAC water | More acidic pI compared to DAC version. Initial dissolution in dilute acetic acid improves solubility, then dilute for use. |
| GHRP-2 | 0.6% Acetic Acid | Basic peptide with a high isoelectric point. Acidic conditions (acetic acid) are needed for optimal solubility. |
| GHRP-6 | 0.6% Acetic Acid | Similar to GHRP-2, a basic peptide requiring acidic conditions for proper dissolution. |
| Hexarelin | 0.6% Acetic Acid | Another basic growth hormone-releasing peptide, best dissolved in dilute acetic acid. |
| IGF-1 LR3 | 0.6% Acetic Acid | Acidic isoelectric point (pI ~8.3). Requires an acidic environment for stability and solubility. |
| IGF-1 DES | 0.6% Acetic Acid | Similar to IGF-1 LR3, possesses an acidic isoelectric point that necessitates an acidic solvent for dissolution. |
| GHK-Cu | BAC Water (low conc) or Acetic Acid (high conc) | Solubility depends on concentration. For lower concentrations, BAC water is fine. For higher concentrations or if precipitation occurs, dilute acetic acid can improve solubility. |
| Retatrutide | Bacteriostatic Water (BAC Water) | Generally designed for aqueous solubility. BAC water is suitable for reconstitution and preservation. |
| Semaglutide | Bacteriostatic Water (BAC Water) | A GLP-1 receptor agonist, typically formulated for aqueous solubility. BAC water is the standard. |
| Tirzepatide | Bacteriostatic Water (BAC Water) | Dual GIP and GLP-1 receptor agonist. Best reconstituted in BAC water for stability and solubility. |
| Sermorelin | Bacteriostatic Water (BAC Water) | Water-soluble GHRH analog. BAC water ensures sterility and extends solution stability. |
| PT-141/Bremelanotide | Bacteriostatic Water (BAC Water) | Melanocortin receptor agonist, readily soluble in BAC water. |
| SLU-PP-332 | DMSO then dilute with BAC Water | Highly hydrophobic compound. Requires initial dissolution in Dimethyl Sulfoxide (DMSO) before dilution with an aqueous solvent like BAC water for experimental use. |
| Epithalon | Bacteriostatic Water (BAC Water) or Sterile Water | Readily water-soluble. BAC water is preferred for extended storage, sterile water for immediate, single-use applications. |
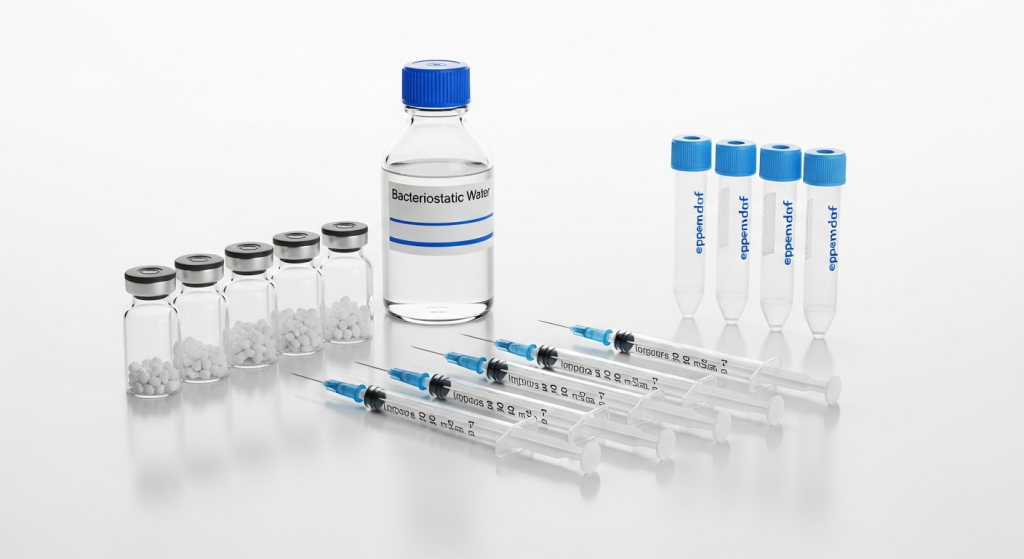
Bacteriostatic Water (BAC Water)
Bacteriostatic Water for Injection (BAC Water) is the most commonly recommended solvent for reconstituting a wide range of research peptides. It is sterile water that contains 0.9% (9 mg/mL) of benzyl alcohol, which acts as a bacteriostatic preservative. The term “bacteriostatic” means that it inhibits the growth of most common bacteria, thereby extending the shelf life of the reconstituted peptide solution. This is particularly advantageous for research protocols that require multiple doses over several days or weeks from a single reconstituted vial, as it significantly reduces the risk of microbial contamination. The 0.9% benzyl alcohol concentration is generally well-tolerated by most peptides and does not typically interfere with their stability or biological activity when used in appropriate concentrations for research applications. However, it is always prudent to consult specific peptide literature or a Certificate of Analysis (COA) from suppliers like Loti Labs (available at lotilabs.com/coa) for any known incompatibilities or sensitivities.
Sterile Water — Single-Use Only
Sterile Water for Injection is purified water that has been sterilized, typically through filtration and autoclaving, to remove all microorganisms and pyrogens. Unlike bacteriostatic water, sterile water does not contain any antimicrobial preservatives. While it is perfectly suitable for reconstituting peptides, especially those that are sensitive to benzyl alcohol, its lack of a bacteriostatic agent means that the reconstituted solution is highly susceptible to bacterial growth once the vial has been punctured. Therefore, solutions reconstituted with sterile water should ideally be used immediately or within 24 hours and discarded thereafter. It is generally recommended for single-use applications where the entire reconstituted volume will be consumed in one experimental session. For applications requiring multi-dose vials or longer storage of the reconstituted solution, BAC water is the superior choice due to its preservative properties.
Dilute Acetic Acid — For Acidic Peptides
Certain peptides, particularly those with a basic character or an acidic isoelectric point (pI), require an acidic environment for optimal solubility and stability. Peptides are amphoteric molecules, meaning they contain both acidic (carboxyl) and basic (amino) functional groups. The net electrical charge of a peptide is highly dependent on the pH of its surrounding environment. The isoelectric point (pI) is the specific pH at which a peptide carries no net electrical charge. At this pH, the peptide’s solubility is typically at its lowest, as molecules tend to aggregate due to reduced electrostatic repulsion. For peptides with a high pI (meaning they are basic), or those that exhibit poor solubility in neutral pH solutions, an acidic solvent is necessary.
For instance, peptides such as IGF-1 LR3, IGF-1 DES, GHRP-2, GHRP-6, and Hexarelin are known to have isoelectric points that render them less soluble or stable in neutral pH solutions. By dissolving these peptides in a dilute acetic acid solution, the pH of the environment is lowered. This acidic pH protonates the basic amino acid residues (like lysine, arginine, histidine) and the N-terminus, increasing the overall positive charge of the peptide. This increase in net positive charge leads to greater electrostatic repulsion between peptide molecules, preventing aggregation and promoting better dissolution in the solvent. The result is a clear, stable solution, which is crucial for accurate dosing and consistent experimental results.
How to Prepare 0.6% Acetic Acid
Preparing a 0.6% acetic acid solution requires careful measurement and adherence to safety protocols, as glacial acetic acid is a corrosive chemical. The concentration of 0.6% is a common recommendation for peptides requiring an acidic solvent, as it provides sufficient acidity without being overly harsh on the peptide structure. Here’s a standard method for preparation:
- Gather Supplies: You will need glacial acetic acid (typically 99.5-100% pure), sterile water (preferably pyrogen-free), sterile graduated cylinders or volumetric flasks, sterile pipettes, a sterile container for the final solution, and appropriate personal protective equipment (PPE) such as laboratory coat, gloves, and eye protection.
- Calculate Volume: To prepare 100 mL of 0.6% acetic acid solution from glacial acetic acid (which is essentially 100% pure), you would need 0.6 mL of glacial acetic acid. The remaining volume will be sterile water (100 mL – 0.6 mL = 99.4 mL).
- Measure Glacial Acetic Acid: Carefully and accurately pipette 0.6 mL of glacial acetic acid into a sterile volumetric flask or graduated cylinder. Always add acid to water, not water to acid, to manage heat generation and prevent splashing.
- Add Sterile Water: Slowly add approximately 50 mL of sterile water to the volumetric flask containing the acetic acid. Swirl gently to mix.
- Bring to Final Volume: Continue adding sterile water until the total volume reaches 100 mL. Ensure the meniscus aligns with the 100 mL mark for accurate concentration.
- Mix Thoroughly: Cap the flask and invert several times to ensure complete and uniform mixing of the solution.
- Sterilization (Optional but Recommended): If not using sterile water and equipment throughout, or for enhanced sterility, the final 0.6% acetic acid solution can be sterile-filtered through a 0.22 µm syringe filter into a sterile vial.
Always label the prepared solution clearly with its concentration, date of preparation, and expiration date. Store at 2-8°C. This dilute acetic acid solution provides the necessary acidic environment to ensure proper dissolution and maintain the stability of peptides such as IGF-1 LR3, GHRP-2, GHRP-6, and Hexarelin.
DMSO — For Hydrophobic Compounds
Dimethyl Sulfoxide (DMSO) is a powerful aprotic solvent known for its ability to dissolve a wide range of organic compounds, including many highly hydrophobic peptides that exhibit poor solubility in aqueous solutions. DMSO is highly polar and can readily penetrate biological membranes, making it a valuable tool in laboratory research. For peptides like SLU-PP-332, which are characterized by significant hydrophobicity, initial dissolution in a small volume of high-purity, sterile DMSO is often the only way to achieve a concentrated stock solution. The mechanism behind DMSO’s effectiveness lies in its ability to disrupt hydrogen bonding networks in water and interact strongly with non-polar regions of molecules, thereby enhancing the solubility of hydrophobic compounds.
However, DMSO is not without its considerations. It can be cytotoxic at higher concentrations and can affect cellular processes, so it is typically used as a primary solvent only for initial dissolution, followed by significant dilution with an aqueous solution (such as BAC water or sterile water) before being introduced into biological systems. When using DMSO, it is crucial to use a high-grade, molecular biology-grade or cell culture-grade product to avoid introducing impurities that could interfere with experiments. Additionally, peptides dissolved in DMSO should be stored appropriately, often at -20°C or below, as DMSO can enhance degradation pathways for some compounds over time, particularly if exposed to moisture. Researchers must also be mindful of the potential for DMSO to carry other compounds across biological membranes, which can be an advantage or a disadvantage depending on the experimental design.
Essential Laboratory Supplies
Successful and aseptic peptide reconstitution relies on having the correct equipment and maintaining a sterile environment. Before you begin the reconstitution process, ensure you have all the necessary supplies readily available and organized. This proactive approach minimizes contamination risks and ensures a smooth workflow.
- Lyophilized Peptide Vial: The star of the show. Ensure it is the correct peptide and concentration as ordered from a reputable vendor like Loti Labs. Verify the integrity of the vial and stopper.
- Appropriate Solvent: Based on the peptide’s characteristics, this will typically be Bacteriostatic Water (BAC Water), Sterile Water for Injection, 0.6% Acetic Acid, or high-purity Dimethyl Sulfoxide (DMSO). Always use a fresh, unopened vial of solvent for each reconstitution, or if using a multi-dose solvent vial (like BAC water), ensure it has been properly stored and handled aseptically.
- Sterile Syringes:
- Insulin Syringes (U-100, 1mL): These are ideal for drawing and injecting small, precise volumes (e.g., 0.01 mL to 1 mL) and for administering doses. Their fine gauge needles (e.g., 29G to 31G) minimize damage to vial stoppers and discomfort in animal models.
- Larger Volume Syringes (e.g., 3mL, 5mL, 10mL): Useful for preparing larger volumes of solvent (e.g., for creating 0.6% acetic acid solution) or for drawing solvent from a multi-dose bottle.
- Sterile Needles:
- Venting Needle (18G or 20G): A larger gauge needle is essential for equalizing pressure in lyophilized vials, preventing mechanical shearing of the peptide. This needle should ideally be attached to an empty syringe or simply inserted to vent.
- Drawing/Injecting Needles (23G to 27G): For drawing solvent from its container and for carefully injecting it into the peptide vial. A finer gauge needle (e.g., 25G to 27G) is preferred for injecting into the peptide vial to minimize stopper coring and ensure a gentle trickle.
- Alcohol Wipes (70% Isopropyl Alcohol): Crucial for sterilizing vial stoppers, hands (if gloves are not worn, though gloves are preferred), and workspace surfaces.
- Protease Contamination Risk: Bare hands harbor proteases — enzymes present in sweat and skin oils that enzymatically cleave peptide bonds and can irreversibly degrade your research compound. This is not a theoretical risk: direct finger contact with a peptide vial or stopper can introduce meaningful protease activity into your solution within minutes. Always wear sterile gloves and avoid touching vial stoppers with bare skin.
- Sterile Gloves: To maintain an aseptic environment and protect your hands from chemical exposure.
- Laboratory Bench Mat or Sterile Surface: A clean, designated area for performing the reconstitution. A disposable bench mat can help maintain sterility.
- Laminar Flow Hood or Clean Bench (Recommended): A laminar flow hood provides a HEPA-filtered, positive-pressure sterile workspace that eliminates airborne particulates from the reconstitution area. While not mandatory for all laboratory settings, it represents the gold standard for aseptic peptide handling and is strongly recommended for any long-term or repeat-access reconstitution protocols.
- Sharps Container:
For safe disposal of all used needles and syringes. This is a non-negotiable safety item. - Vortex Mixer (Optional): While gentle swirling is preferred for dissolution, a very brief, low-speed vortex can sometimes aid in dissolving stubborn peptides, but extreme caution must be exercised to avoid foaming.
- Parafilm or Vial Seals: For sealing vials after reconstitution to minimize evaporation and maintain sterility during storage.
- Labels: For clearly marking reconstituted vials with peptide name, concentration, date of reconstitution, solvent used, and expiration date.
- Timer: To monitor equilibration time to room temperature.
By preparing these items in advance, you can approach the reconstitution process systematically and with confidence, ensuring the integrity and quality of your research peptide solutions.
Step-by-Step Peptide Reconstitution Protocol
Reconstituting research peptides is a precise procedure that requires meticulous attention to detail and aseptic technique. Following these steps carefully will help preserve the peptide’s delicate structure and ensure its biological activity for your research.
Step 1: Equilibrate to Room Temperature
Before beginning the reconstitution process, it is critical to allow your lyophilized peptide vial to equilibrate to room temperature. This step is often overlooked but is fundamental for preventing condensation. When a cold vial (e.g., from freezer or refrigerator storage) is exposed to warmer, humid ambient air, moisture from the air can condense on the exterior and, more critically, on the interior surfaces of the vial once opened or punctured. This condensation introduces non-sterile water into the peptide powder, potentially leading to premature degradation, altered concentration, or microbial contamination. To properly equilibrate, remove the peptide vial from its cold storage (freezer or refrigerator) and place it on a clean, dry surface at room temperature for at least 30-60 minutes, or until the vial no longer feels cold to the touch. This allows the vial and its contents to gradually reach ambient temperature, preventing any unwanted moisture accumulation.
Step 2: Sanitize Workspace and Vial Stoppers
Maintaining an aseptic environment is paramount to prevent microbial contamination, which can significantly compromise your research results. Begin by thoroughly cleaning your designated workspace. Use a laboratory-grade disinfectant or 70% isopropyl alcohol to wipe down the entire surface. Allow the alcohol to air dry completely. Next, don sterile gloves to minimize the transfer of microorganisms from your hands. Before puncturing any vial, rigorously sterilize the rubber stoppers of both the peptide vial and the solvent vial. Use a fresh 70% isopropyl alcohol wipe for each stopper, scrubbing the surface firmly for several seconds. Allow the alcohol to evaporate fully before proceeding; this ensures the alcohol has effectively disinfected the surface and that no residual alcohol enters the vials, which could potentially interact with the peptide or solvent.
Step 3: Equalize Vial Vacuum Pressure
This step is uniquely critical and often misunderstood, yet it can significantly impact the integrity of your peptide. Lyophilized peptide vials are typically sealed under a negative pressure (a vacuum) to maintain sterility and prevent oxidation. If you simply insert a needle and rapidly depress the plunger to release solvent into such a vacuum-sealed vial, the negative pressure will forcefully and instantly draw the liquid in. This rapid influx causes the solvent to spray with considerable force directly onto the delicate lyophilized peptide cake. This forceful impact can lead to mechanical shearing of the peptide’s molecular structure. Peptides, especially larger or more complex ones, are sensitive molecules. The physical stress of being rapidly rehydrated under high impact can denature their fragile secondary and tertiary structures, leading to aggregation, reduced solubility, and ultimately, a loss of biological activity. This irreversible damage can compromise your experimental outcomes before the peptide even reaches its target.
To prevent this detrimental effect, proper pressure equalization is essential:
- Method 1 (Preferred – Venting Needle): Before introducing any solvent, take a separate, sterile, large-gauge needle (e.g., 18G or 20G) attached to an empty syringe. Carefully insert this “venting needle” through the rubber stopper of the lyophilized peptide vial. You will hear a hiss as air rushes in to equalize the pressure. Once the pressure is equalized, you can then remove the venting needle and proceed to inject your solvent with a separate, solvent-loaded syringe using the “wall trickle” method described in Step 5.
- Method 2 (Alternative – Slow Syringe Insertion): If a separate venting needle is not immediately available, you can still mitigate the vacuum’s impact. Load your solvent into the desired syringe. Insert the needle slowly through the rubber stopper. Before fully depressing the plunger, slightly withdraw the plunger by a small amount (e.g., 0.1 mL). This creates a small air pocket in the syringe barrel, which will be drawn into the vial first, gently equalizing some of the pressure. Then, very slowly and carefully, depress the plunger, ensuring the solvent is released gradually and without force.
Skipping this step carries significant molecular consequences. The mechanical stress can lead to the formation of insoluble aggregates, increased peptide degradation products, and a reduction in the number of active peptide molecules available for your research. By taking the extra moment to equalize the pressure, you protect the delicate structure of your peptide and ensure its maximum efficacy.
Step 4: Load the Syringe and Calculate Volume
Once the workspace and vials are prepped, it’s time to prepare your solvent. Using a fresh, sterile syringe and needle (e.g., 23G to 27G for drawing from a multi-dose solvent vial), carefully draw the exact calculated volume of your chosen solvent. The volume of solvent required depends on the desired final concentration of your peptide. This calculation is crucial for accurate dosing in your experiments and will be covered in detail in the “Reconstitution Math” section. For example, if you have a 5 mg peptide vial and wish to achieve a concentration of 2 mg/mL, you would need 2.5 mL of solvent (5 mg ÷ 2 mg/mL = 2.5 mL). Ensure there are no air bubbles in the syringe by gently tapping the barrel and expelling any air before proceeding. Double-check your solvent volume against your calculations to prevent errors in concentration.
Step 5: Wall Trickle Solvent Addition
With the solvent loaded and pressure equalized (if applicable), it’s time to introduce the solvent to the peptide. This step requires a gentle approach to prevent direct impact on the peptide cake. Carefully insert the needle (attached to your solvent-loaded syringe) through the rubber stopper of the peptide vial. Instead of pointing the needle directly at the center of the peptide cake, angle the needle so that its tip is directed towards the inner glass wall of the vial, just above the peptide powder. Slowly and steadily depress the plunger, allowing the solvent to run down the inner glass wall of the vial. This “wall trickle” method ensures that the solvent gently rehydrates the peptide cake from the edges inward, rather than forcefully spraying it. Direct application of solvent onto the peptide cake can cause localized high concentrations, lead to mechanical stress, and result in clumping or incomplete dissolution. By allowing the solvent to flow smoothly down the wall, you promote a more even and gentle rehydration, preserving the peptide’s structural integrity and facilitating complete dissolution.
Passive dissolution is the preferred approach for delicate or large-molecule peptides: after adding the solvent using the wall trickle technique, simply cap the vial, place it in the refrigerator at 2–8°C, and allow the peptide to dissolve on its own over 5–15 minutes. Large-molecule GLP-1 agonists such as Retatrutide (~4,765 Da molecular weight) and Tirzepatide (~4,813 Da) benefit particularly from passive dissolution due to their complex tertiary structures — forcing dissolution by agitation risks shearing the molecule’s alpha-helical regions.
Step 6: Swirl — Never Shake
After adding the solvent, the peptide may not dissolve instantly. It is tempting to shake the vial vigorously to speed up the process, but this is a critical error that can lead to peptide denaturation and loss of activity. Shaking introduces air bubbles into the solution, creating a large air-water interface. Peptides, particularly larger or more complex ones, are often sensitive to these interfaces. The forces at the air-water interface can cause the peptide molecules to unfold or aggregate, a process known as surface-induced denaturation. This can lead to irreversible changes in the peptide’s secondary and tertiary structures, forming insoluble aggregates, reducing solubility, and ultimately diminishing or abolishing its biological function. Instead of shaking, gently swirl the vial with a slow, rotational motion. You can also gently roll the vial between your palms. This gentle agitation promotes the dissolution of the peptide into the solvent without creating damaging foam or air-water interfaces. Allow sufficient time for the peptide to dissolve completely, which may take several minutes to an hour, depending on the peptide’s properties and the solvent used. A clear, particulate-free solution indicates complete dissolution.
Reconstitution Math: Calculating Peptide Concentration
Accurate calculation of peptide concentration is fundamental for precise dosing in any research protocol. Errors in this step can lead to inconsistent experimental results, wasted peptide, and compromised data validity. The basic formula for calculating concentration is straightforward:
Concentration (mg/mL) = Peptide Mass (mg) ÷ Solvent Volume (mL)
This formula allows you to determine the resulting concentration based on the amount of peptide in the vial and the volume of solvent you add. Conversely, you can rearrange this formula to calculate the required solvent volume to achieve a desired concentration:
Solvent Volume (mL) = Peptide Mass (mg) ÷ Desired Concentration (mg/mL)
For example, if you have a 10 mg vial of peptide and you wish to achieve a concentration of 5 mg/mL, you would add 2 mL of solvent (10 mg ÷ 5 mg/mL = 2 mL). If you wanted a concentration of 2 mg/mL from the same 10 mg vial, you would add 5 mL of solvent (10 mg ÷ 2 mg/mL = 5 mL).
It is always advisable to perform these calculations carefully and double-check them before adding any solvent. Using a precise measuring device like an insulin syringe for smaller volumes or a calibrated pipette for larger volumes is crucial for accuracy.
Peptide reconstitution calculator: For researchers who prefer automated calculation — particularly when handling precision protocols with GLP-1 agonists such as Semaglutide, Tirzepatide, and Retatrutide — a peptide dosage calculator eliminates manual math errors. Enter vial size and solvent volume to instantly generate concentration and per-dose volumes for any target research dose.
Quick Reference Concentration Cheat Sheet
This cheat sheet provides common reconstitution scenarios to quickly determine resulting concentrations and the volume required for specific doses when using insulin syringes (U-100, 1mL = 100 IU). This table assumes complete dissolution of the peptide.
| Peptide Vial Size | Solvent Added (mL) | Resulting Concentration (mg/mL) | Per 100mcg (mL / IU) | Per 250mcg (mL / IU) | Per 500mcg (mL / IU) | |
|---|---|---|---|---|---|---|
| 2 mg | 1 mL | 2 mg/mL | 0.05 mL / 5 IU | 0.125 mL / 12.5 IU | 0.25 mL / 25 IU | |
| 2 mg | 2 mL | 1 mg/mL | 0.1 mL / 10 IU | 0.25 mL / 25 IU | 0.5 mL / 50 IU | |
| 5 mg | 1 mL | 5 mg/mL | 0.02 mL / 2 IU | 0.05 mL / 5 IU | 0.1 mL / 10 IU | |
| 5 mg | 2 mL | 2.5 mg/mL | 0.04 mL / 4 IU | 0.1 mL / 10 IU | 0.2 mL / 20 IU | |
| 5 mg | 5 mL | 1 mg/mL | 0.1 mL / 10 IU | 0.25 mL / 25 IU | 0.5 mL / 50 IU | |
| 10 mg | 1 mL | 10 mg/mL | 0.01 mL / 1 IU | 0.025 mL / 2.5 IU | 0.05 mL / 5 IU | |
| 10 mg | 2 mL | 5 mg/mL | 0.02 mL / 2 IU | 0.05 mL / 5 IU | 0.1 mL / 10 IU | |
| 10 mg | 5 mL | 2 mg/mL | 0.05 mL / 5 IU | 0.125 mL / 12.5 IU | 0.25 mL / 25 IU | |
| 20 mg | 2 mL | 10 mg/mL | 0.01 mL / 1 IU | 0.025 mL / 2.5 IU | 0.05 mL / 5 IU | |
| 20 mg | 5 mL | 4 mg/mL | 0.025 mL / 2.5 IU | 0.0625 mL / 6.25 IU | 0.125 mL / 12.5 IU | |
| BPC-157 | 5mg | 2mL BAC water | 2.5mg/mL | 4 IU (0.04mL) | 10 IU (0.10mL) | 20 IU (0.20mL) |
| TB-500 | 5mg | 2mL BAC water | 2.5mg/mL | 4 IU (0.04mL) | 10 IU (0.10mL) | 20 IU (0.20mL) |
Syringe Unit Conversions
Understanding unit conversions is essential for accurate dosing, especially when using insulin syringes, which are typically marked in International Units (IU) rather than milliliters (mL).
- Mass Conversion: 1 milligram (mg) = 1000 micrograms (mcg). This conversion is frequently used when doses are specified in micrograms.
- Volume Conversion (Insulin Syringe): A standard U-100 insulin syringe holds 1 milliliter (mL) and is marked with 100 International Units (IU). Therefore, 100 IU = 1 mL. This also means 10 IU = 0.1 mL, 5 IU = 0.05 mL, and so on.
Worked Example:
Let’s say you have a 5 mg vial of peptide that you have reconstituted with 1 mL of BAC water. You need to administer a dose of 250 mcg for your animal model research protocol.
- Calculate Concentration:
- Peptide Mass = 5 mg
- Solvent Volume = 1 mL
- Concentration = 5 mg / 1 mL = 5 mg/mL
- Convert Concentration to micrograms per milliliter:
- 5 mg/mL = 5000 mcg/mL (since 1 mg = 1000 mcg)
- Calculate Volume for Desired Dose:
- Desired Dose = 250 mcg
- Concentration = 5000 mcg/mL
- Volume (mL) = Desired Dose ÷ Concentration = 250 mcg ÷ 5000 mcg/mL = 0.05 mL
- Convert Volume to Insulin Units (IU):
- Since 1 mL = 100 IU, then 0.05 mL = 0.05 * 100 IU = 5 IU
Therefore, to administer a 250 mcg dose from a 5 mg/mL solution, the researcher would draw up 0.05 mL for in vivo administration in an animal research model, which corresponds to 5 IU on a U-100 insulin syringe. Always use the smallest syringe that can accurately measure your desired volume to maximize precision.
Storage After Reconstitution
Proper storage is critical for maintaining the stability and potency of both lyophilized and reconstituted research peptides. Incorrect storage conditions can lead to degradation, reduced efficacy, and compromise your experimental results.
Storage of Reconstituted Peptides:
Once a peptide has been reconstituted, its stability significantly decreases compared to its lyophilized form. The presence of water increases the risk of hydrolysis, oxidation, and microbial growth. Therefore, reconstituted peptides must be stored under specific conditions to maximize their shelf life:
- Temperature: Reconstituted peptide solutions should always be stored in a refrigerator, typically at 2-8°C (36-46°F). This temperature range slows down chemical degradation processes and inhibits the growth of most bacteria, especially when bacteriostatic water is used as the solvent.
- Duration:
- With Bacteriostatic Water (BAC Water): Peptides reconstituted with BAC water generally maintain good stability for 4-8 weeks when stored at 2-8°C. The benzyl alcohol acts as a preservative, preventing bacterial contamination during this period. However, always observe the solution for any signs of turbidity or particulate formation, which may indicate degradation or contamination.
- With Sterile Water: If sterile water (without a bacteriostatic agent) is used, the reconstituted solution should be used immediately, ideally within 24 hours, and any remaining solution should be discarded. The absence of a preservative makes it highly susceptible to microbial growth once the vial has been punctured.
- With Dilute Acetic Acid or DMSO: Storage duration for solutions made with dilute acetic acid or DMSO (and then diluted with an aqueous solution) can vary. Generally, these should also be stored at 2-8°C for a few weeks, but specific peptide stability data should be consulted. Some peptides in DMSO may be stored frozen, but this depends heavily on the peptide’s characteristics and the specific concentration.
- Light Protection: Many peptides are sensitive to light, particularly UV radiation, which can catalyze degradation reactions. Always store reconstituted peptide vials in their original amber vials or wrap them in aluminum foil to protect them from light exposure.
- Avoid Freeze-Thaw Cycling: Repeated freezing and thawing of reconstituted peptide solutions should be strictly avoided. Freeze-thaw cycles can cause physical stress to the peptide molecules, leading to aggregation, denaturation, and loss of activity. If aliquoting is necessary for long-term storage of a reconstituted solution (which is generally not recommended for peptides reconstituted with BAC water due to limited stability), it should be done once into single-use aliquots, which are then frozen at -20°C or -80°C. However, freezing reconstituted peptides, even once, is generally discouraged unless specific stability data supports it for your particular peptide.
- Minimize Air Exposure: After drawing a dose, replace the syringe needle and cap the vial securely to minimize exposure to air, which can introduce contaminants and promote oxidation.
Storage of Lyophilized Peptides:
Lyophilized peptides are significantly more stable than their reconstituted counterparts, but proper storage is still essential for their long-term integrity.
- Long-Term Storage: For storage exceeding a few months, lyophilized peptides should be kept in a freezer at -20°C (or ideally -80°C for maximum stability). Under these conditions, they can remain stable for up to 24 months or longer.
- Short-Term Storage: For short-term storage (up to 3 months), lyophilized peptides can typically be stored in a refrigerator at 2-8°C.
- Desiccant: Lyophilized vials should be stored with a desiccant (e.g., silica gel packets) to absorb any residual moisture, especially if the vials are not hermetically sealed or if there’s a risk of temperature fluctuations.
- Light and Air Protection: Keep lyophilized vials in their original packaging, often amber or opaque, and sealed to protect from light and moisture.
Always refer to the Certificate of Analysis (COA) provided by Loti Labs (available at lotilabs.com/coa) or specific product information for the most accurate and up-to-date storage recommendations for each individual peptide, as stability can vary.
Troubleshooting Common Reconstitution Errors
Even with careful adherence to protocols, issues can sometimes arise during peptide reconstitution. Knowing how to diagnose and address these common problems can save valuable peptide and experimental time.
Cloudy or Turbid Solution
A properly reconstituted peptide solution should appear clear and free of particulates. If your solution appears cloudy, turbid, or has visible particles, several issues could be at play:
- Incomplete Dissolution: This is the most common cause. The peptide may not have fully dissolved. This can happen if the solvent volume is insufficient, the peptide is highly concentrated, or if insufficient time was allowed for gentle swirling.
- Solution: Continue gentle swirling for an extended period (up to an hour or more). If necessary, try placing the vial at room temperature for a bit longer, or gently warm it between your hands. Do NOT shake. If the peptide is known to require an acidic solvent (e.g., IGF-1 LR3, GHRP-2), ensure you used the correct solvent (0.6% acetic acid). If you initially used BAC water and suspect an acidic peptide, you may need to add a very small, precise amount of dilute acetic acid (e.g., 0.01-0.05 mL of 0.6% acetic acid) and observe.
- Peptide Aggregation/Precipitation: This indicates that the peptide is coming out of solution, often due to improper solvent choice (e.g., using BAC water for an acidic peptide), incorrect pH, or denaturation. Aggregation can be irreversible.
- Solution: Review the peptide’s specific solvent requirements (refer to the Solvent Classification Table). If the peptide required an acidic solvent and was reconstituted in neutral water, it may have precipitated. In some cases, adding a small amount of the correct solvent (e.g., 0.6% acetic acid) might redissolve it, but often, severe aggregation is irreversible, and the peptide may be compromised.
- Microbial Contamination: While less common immediately after reconstitution, a cloudy solution can sometimes indicate bacterial or fungal growth, especially if non-sterile water was used or aseptic technique was compromised.
- Solution: If contamination is suspected (e.g., foul odor, visible growth over time), the solution should be discarded immediately. Ensure strict aseptic technique for future reconstitutions.
- Presence of Insoluble Impurities: Rarely, the peptide powder itself might contain insoluble excipients or impurities.
- Solution: If the peptide is from a reputable source like Loti Labs, this is unlikely, as our COAs confirm high purity. If this is suspected, contact the supplier with your batch number.
Needle Insertion Resistance (Vacuum)
When trying to insert a needle into a lyophilized peptide vial, you might encounter significant resistance or feel the needle being strongly pulled into the vial. This is a clear indication that the vial is under strong negative pressure (a vacuum), and you are experiencing the effects described in Step 3 of the reconstitution protocol.
- Cause: Lyophilized vials are sealed under vacuum to preserve peptide stability. If you attempt to inject solvent without equalizing the pressure, the vacuum will resist the needle insertion and then rapidly draw in any liquid.
- Consequence: As detailed previously, this can lead to mechanical shearing of the peptide structure, causing irreversible damage, aggregation, and loss of biological activity.
- Solution:
- Use a Venting Needle: The most effective solution is to insert a separate, sterile, large-gauge needle (e.g., 18G or 20G) attached to an empty syringe into the vial first. This will equalize the pressure, often with an audible hiss. Once the pressure is balanced, you can remove the venting needle and proceed to inject your solvent gently with a separate syringe.
- Slow Insertion and Plunger Release: If a venting needle isn’t available, insert your solvent-loaded syringe very slowly. Before fully depressing the plunger, slightly withdraw the plunger (e.g., 0.1 mL) to allow a small amount of air into the vial, partially equalizing the pressure. Then, slowly and gently depress the plunger, ensuring the solvent trickles down the vial wall.
Never force the solvent into a vacuum-sealed vial. Patience and proper technique here are crucial for preserving your peptide’s integrity.
Peptide Not Dissolving
After adding the solvent and performing gentle swirling for a reasonable amount of time, if the peptide still appears as a solid mass or visible particles and refuses to dissolve into a clear solution, consider these possibilities:
- Incorrect Solvent Choice: This is a primary reason for dissolution failure. The peptide’s inherent properties (e.g., hydrophobicity, isoelectric point) might necessitate a specific solvent that was not used.
- Solution: Re-verify the recommended solvent for your specific peptide (refer to the Solvent Classification Table). For example, if you tried to dissolve IGF-1 LR3 in BAC water, it will likely not dissolve properly. You would need 0.6% acetic acid. If you used the wrong solvent, you may need to carefully remove the incorrect solvent (if possible, though risky) and attempt reconstitution with the correct one. However, once a peptide has been exposed to an incompatible solvent, its integrity may already be compromised.
- Insufficient Swirling Time: Some peptides, especially at higher concentrations, require more time and gentle agitation to fully dissolve.
- Solution: Continue gentle swirling or rolling the vial between your palms for an extended period, perhaps 30-60 minutes or even longer. You can also allow the vial to sit undisturbed at room temperature for a while and then gently swirl again.
- Temperature Issues: Very cold solvent or peptide can slow down dissolution.
- Solution: Ensure both the peptide vial and the solvent are at room temperature before reconstitution. After adding solvent, allow the vial to sit at room temperature for a period, then try gentle swirling again.
- Peptide Degradation/Aggregation: If the peptide has degraded during storage or was exposed to improper conditions (e.g., heat, moisture), it might form insoluble aggregates that will not dissolve.
- Solution: Unfortunately, irreversible aggregation means the peptide is likely compromised and should be discarded. Ensure proper storage of lyophilized peptides as per manufacturer recommendations.
- High Concentration: If you are trying to achieve a very high concentration, the peptide might be at or near its saturation point in the chosen solvent.
- Solution: If possible for your research, consider adding a slightly larger volume of solvent to reduce the concentration, which might improve solubility.
Patience and a systematic approach to troubleshooting are key. Always prioritize gentle handling to avoid further damaging the peptide.
GHK-Cu Blue Coloration — Normal Observation
Researchers new to GHK-Cu (copper peptide) often express concern when their reconstituted solution appears deep blue or teal in color. This is entirely normal and expected. The blue coloration results from the copper (Cu²⁺) ions that are structurally coordinated to the Gly-His-Lys tripeptide backbone. The copper-peptide chelate complex absorbs light in the orange-red spectrum (~600–700 nm), giving the solution its characteristic blue-green hue. If your GHK-Cu solution is clear and colorless after reconstitution, this may indicate that the copper was not properly bound during synthesis — a potential quality issue that warrants COA verification.
Frequently Asked Questions
Continue Your Research
Explore our complete catalog of premium research compounds.